Facial Gua Sha: 3 Simple Techniques for Jaw and Forehead Tension
Facial Gua Sha: 3 Simple Techniques for Jaw and Forehead Tension
By the end of a long day, your face holds more than you realize. The jaw tightens. The brow furrows. The temples feel heavy. This gathering of tension in the face is something many of us accept as normal — but it does not have to be.
Facial gua sha offers a gentle way to release that build-up. A small stone tool, a few drops of oil, and a quiet five minutes are all it takes. The practice is simple, the effect is immediate, and it asks nothing of you except your presence.
Why Facial Tension Gathers in the Jaw and Forehead
The muscles of your face are among the most expressive in your body. They react to every thought, every glance at a screen, every moment of concentration. Over hours and days, these micro-contractions accumulate into lasting tension.
The masseter muscle along the jawline is one of the strongest muscles in the body relative to its size. It clenches when you focus, when you stress, and often when you sleep. The frontalis muscle across your forehead holds the same pattern — pulling down and inward without your noticing.
Facial gua sha works with these muscles at their own pace. Instead of forcing them to relax, it invites the tissue to soften through gentle, repetitive strokes. The pressure stimulates circulation, encourages lymphatic drainage, and signals the nervous system that it is safe to let go.
What You Will Need for Facial Gua Sha
You do not need much to begin. Here is the short list:
- A gua sha tool. Rose quartz, jade, or stainless steel — the material matters less than the shape. Look for a tool with at least one curved edge that fits your jawline and one that fits under your eye. A basic gua sha stone is enough for all three techniques below.
- A facial oil or serum. The tool must glide smoothly over your skin. Any oil, moisturizer, or serum you already use will work. Dry gua sha can tug and irritate the skin.
- Clean hands. Wash before you begin. Clean your tool with soap and water after each use.
If you are looking for a tool, a basic rose quartz gua sha stone is widely available and affordable. Browse rose quartz gua sha tools on Amazon.
Technique 1 — Jawline Release for Clenching and Tightness
This is the technique most people notice a difference with immediately. The jaw holds tension like a closed fist, and this movement invites it to open.
Step 1: Apply a thin layer of oil to your face and neck.
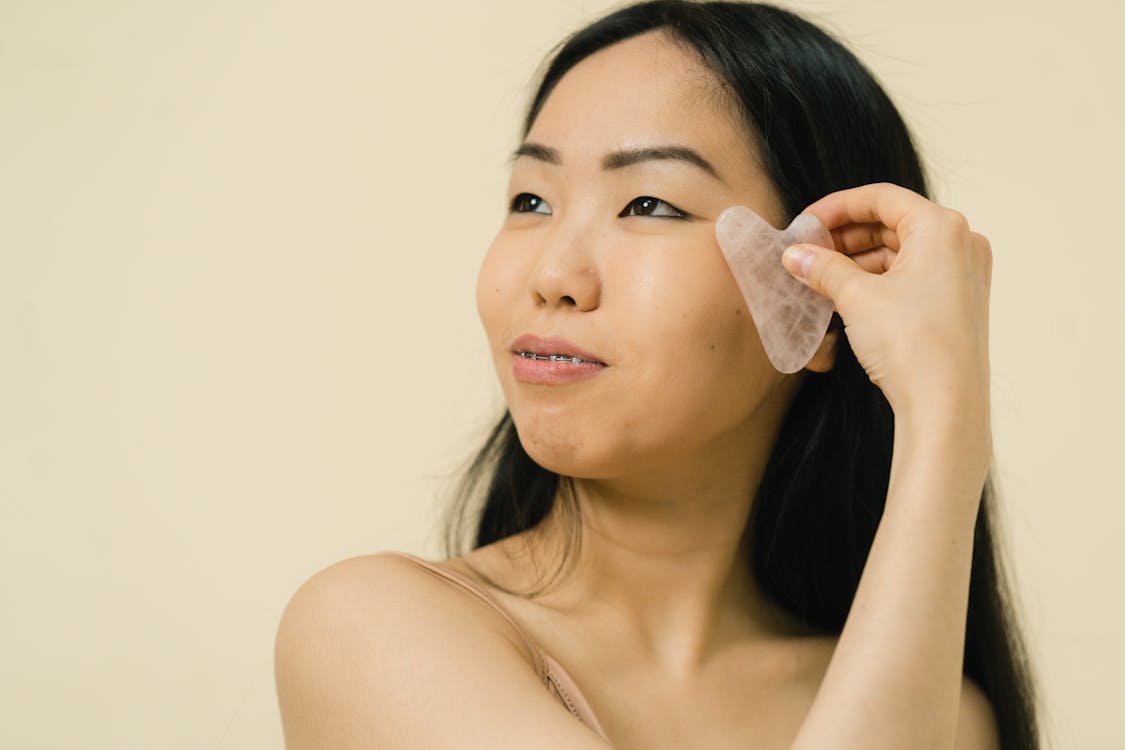
Step 2: Hold your gua sha tool at a 15- to 30-degree angle against your skin, with the curved edge resting along your jawline. The angle matters — too flat and it will not engage the tissue, too steep and it may feel sharp.
Step 3: Starting at the center of your chin, sweep the tool outward along your jawbone toward your earlobe. Move slowly — one sweep should take about three seconds. You might feel a gentle tug or a releasing sensation as the tool passes over tight spots.
Step 4: Repeat 3 to 5 times on each side. Then switch to the other side of your face.
The jawline is rarely rushed in gua sha. The slower you go, the more the muscle has time to respond. After a few strokes, you may notice your jaw feels lighter, as if it has been holding less weight.
Technique 2 — Temple and Brow Softening for Forehead Tension
Screen time and concentrated focus leave their mark on the forehead and temples. This technique addresses both areas in one flowing movement.
Step 1: Apply a little more oil to your forehead if needed.
Step 2: Start at the center of your forehead, just above your brows. Place the flat edge of your gua sha tool against your skin and sweep outward toward your temple.
Step 3: When you reach the temple, pause. Use the rounded edge of the tool to make 3 to 4 small, slow circles on the temple itself. This area often holds a surprising amount of tightness.
Step 4: Continue the sweep down along the side of your face, finishing near your ear. Repeat 3 to 5 times on each side.
The forehead responds well to patience. If you feel a particular spot that wants more attention, stay there. Let the tool and your breath do the work together.
Technique 3 — Under-Eye Gentle Lift for Puffiness
The skin under your eyes is the thinnest on your body. This technique uses the lightest possible pressure — barely more than the weight of the tool itself.
Step 1: Apply a small amount of oil or eye cream under your eyes.
Step 2: Use the smallest curved notch of your gua sha tool — the one designed for the under-eye area. Hold it at a very low angle, almost flat against the skin.
Step 3: Starting at the inner corner of your eye (near your nose), glide the tool outward toward your temple. The movement should feel like a whisper — no dragging, no stretching.
Step 4: Repeat 2 to 3 times on each side. Do not go back and forth. Always sweep in one direction: inward to outward.
This movement supports lymphatic drainage around the eyes, which can help reduce morning puffiness. It is best done gently and only when your skin is well-lubricated.
Tips for a Comfortable Gua Sha Practice
A few simple habits make the difference between a practice you return to and one you abandon:
- Always use oil or serum. Never use a gua sha tool on dry skin. The friction can irritate and even damage the skin barrier.
- Clean your tool after each use. A quick wash with warm water and mild soap is enough. Dry it completely before storing.
- Start with light pressure. You can increase gradually as your skin and muscles become accustomed to the sensation. Gua sha should never hurt.
- Best done in the evening. Facial gua sha fits naturally into a wind-down routine. It signals to your body that the active part of the day is over.
- Listen to your body. If any movement feels sharp, painful, or uncomfortable, ease up or skip that area. Gua sha is an invitation, not a demand.
How Often Should You Practice Facial Gua Sha?
Consistency matters more than intensity. Here is a realistic rhythm:
- 3 to 4 times per week is enough to notice and maintain results. Your face becomes familiar with the practice, and the tension has less time to rebuild between sessions.
- Daily is fine if it feels restorative. A full facial gua sha routine can take as little as 5 minutes. On days when you have more time, you can go slower and deeper.
- Skip a day if your skin feels sensitive. Gua sha is a practice of tuning in, not pushing through.
Over weeks, many people notice that their jaw rests in a more neutral position, their forehead feels softer, and they become more aware of when tension is building — before it settles in.
A Gentle Note
Facial gua sha is a self-care practice, not a medical treatment. It is not intended to diagnose, treat, or cure any condition. If you have active acne, rosacea, eczema, or any skin condition, consult a dermatologist before using gua sha. If you have temporomandibular joint (TMJ) pain that is persistent or severe, seek guidance from a healthcare professional.
The techniques here are for general tension release and relaxation. They work best when paired with good hydration, adequate sleep, and regular breaks from screen time.
This post contains affiliate links that support this site at no extra cost to you.