TCM Wellness
Learn how to use a cupping set at home safely. A complete beginner's guide covering types of cupping sets, step-by-step instructions, and what to expect from cupping marks.

Cupping Therapy at Home: A Complete Beginner's Guide to Cupping Sets and Safe Practice

· TCM Wellness Team
Educational content only. Not medical advice. Consult a healthcare professional before starting any new wellness practice. Some links are affiliate links.

Medical Disclaimer: This article is for informational and educational purposes only. It does not constitute medical advice and is not a substitute for professional medical consultation, diagnosis, or treatment. Always consult a qualified healthcare provider before starting any new wellness practice, especially if you have an existing health condition.


Introduction

Cupping therapy has been part of Traditional Chinese Medicine (TCM) for thousands of years, and it has recently found a new home in modern wellness routines. From elite athletes to everyday wellness enthusiasts, more people are exploring what this ancient practice may offer — and many are curious about doing it at home.

The appeal is understandable. Silicone and plastic pump cupping sets have made the practice far more accessible than it once was, removing the need for open flame or professional equipment. Whether you’re dealing with tight shoulders after long hours at a desk or simply want to explore a new self-care ritual, this guide covers everything a first-timer needs to know: how to choose the right cupping set, how to use it step by step, and how to do it safely.


Section 1: What Is Cupping Therapy?

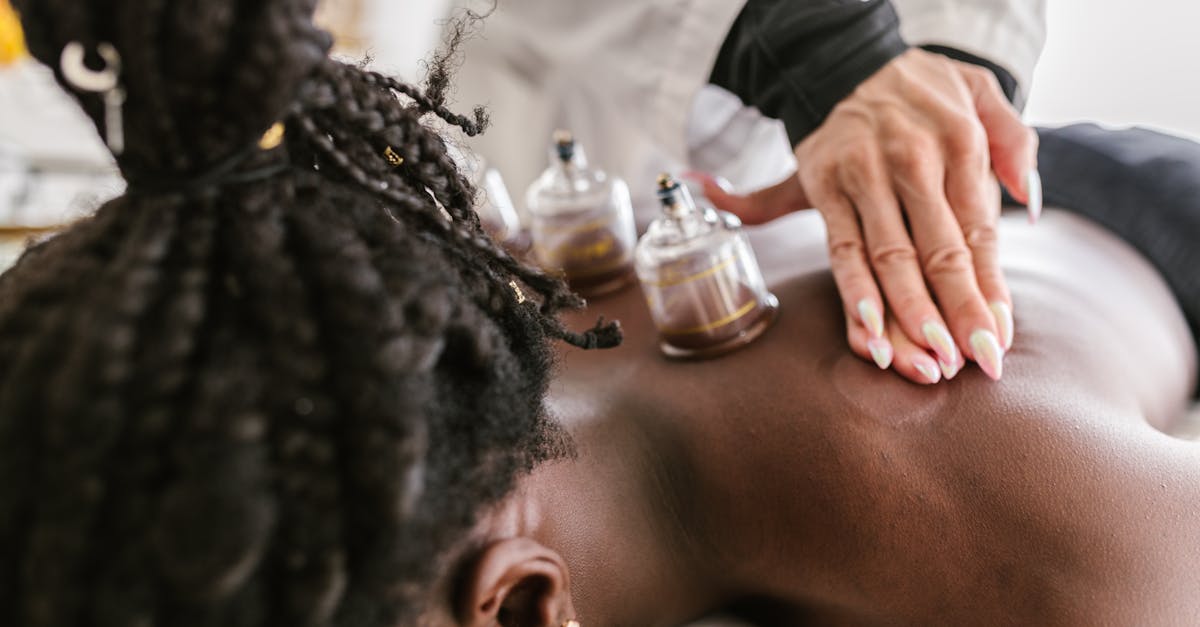
Cupping therapy involves placing specially shaped cups on the skin to create a vacuum or suction effect. According to traditional TCM theory, this suction is thought to encourage the movement of qi (vital energy) and blood through specific pathways in the body. From a modern perspective, the negative pressure draws blood toward the surface of the skin and into the underlying soft tissue.

There are two main types of cupping: dry cupping and wet cupping. This guide focuses exclusively on dry cupping, which is the safe, appropriate option for home use. Wet cupping involves small incisions and is strictly a clinical procedure — it should never be attempted outside of a professional medical setting.

Dry cupping is most commonly applied to:

  • Back and shoulders — areas prone to muscle tension and stiffness
  • Upper arms and legs — large muscle groups
  • Lower back — commonly used for general relaxation in traditional practice

Some people find regular cupping sessions a useful part of their broader wellness routine. It is commonly used for muscle tension, post-exercise recovery, and general relaxation — though individual experiences vary.


Section 2: Types of Cupping Sets

Choosing the right type of cupping set makes a significant difference, especially for beginners. There are three main categories available for home use.

A top-down view of a cupping therapy set arranged neatly in its box Different cupping sets — from glass to silicone — each have distinct advantages depending on your experience level.

Glass Cupping Sets

Glass cups are the traditional choice, still used in many TCM clinics. A flame is briefly passed inside the cup to heat the air, which is then placed quickly against the skin — as the air cools, it contracts and creates suction.

  • Pros: Strong, consistent suction; traditional method; durable
  • Cons: Requires a flame source; higher skill level needed; not recommended for beginners without supervision
  • Best for: Intermediate to advanced users, or those receiving professional treatment

Silicone Cupping Sets

Silicone cups work by simply squeezing the cup to compress it, then releasing it on the skin. The rebound of the silicone creates suction — no heat or flame required.

  • Pros: Safe, flame-free; easy to control pressure; flexible for massage-style movement; beginner-friendly
  • Cons: Suction may be less intense than glass; cups can lose shape over time
  • Best for: First-time users — this is the recommended starting point for home practice

Plastic Pump Cupping Sets

These kits include rigid plastic cups and a hand-operated suction gun. You place the cup on the skin, attach the gun to the valve, and pump to the desired level.

  • Pros: Precise, adjustable suction; no flame; cups hold shape well
  • Cons: Slightly more setup; pump attachment is an extra step
  • Best for: Users who want more control over suction intensity

Quick Comparison

TypeFlame RequiredSuction LevelBeginner-Friendly
GlassYesHighNo
SiliconeNoModerateYes
Plastic PumpNoAdjustableYes

Recommended for beginners: A silicone cupping set is the easiest and safest entry point. Look for a set that includes multiple cup sizes so you can match the cup to the area being treated. Search for beginner silicone cupping sets on Amazon to compare current options and reviews.


Section 3: How to Use a Cupping Set Safely

The following step-by-step guide is written for silicone cupping cups, which are the recommended option for home beginners. Always read the instructions that come with your specific set before starting.

What You’ll Need

  • A silicone cupping set (multiple sizes)
  • Massage oil, body lotion, or coconut oil
  • A clean towel
  • A timer

Step-by-Step Instructions

Step 1 — Prepare the skin Shower or wash the area to be cupped. Apply a thin, even layer of massage oil or body lotion to the skin. This lubricates the surface so the cup can glide (for moving cupping) and helps prevent skin pinching.

Step 2 — Select the right cup size Use larger cups for broad areas like the upper back; smaller cups for shoulders, calves, or tighter spots. Never use a cup that feels too large for the area.

Step 3 — Create the suction Squeeze the silicone cup firmly between your fingers to push air out. While still compressed, place the open end firmly against your oiled skin. Release the squeeze — the cup will grip the skin as the silicone expands back to its natural shape.

Step 4 — Adjust the pressure You should feel a firm pulling sensation — not sharp pain. If it feels uncomfortably tight, gently press the edge of the cup inward to release some suction. A mild, even pulling sensation is normal.

Step 5 — Set a timer and wait Leave the cups in place for 3 to 5 minutes for your first session. Do not exceed 5 minutes as a beginner. Longer sessions can increase the intensity of skin marks.

Step 6 — Remove the cups Do not pull cups straight off. Instead, gently press one edge of the cup inward with your finger to break the seal, then lift the cup away. This prevents skin irritation.

Step 7 — Post-session care Gently wipe off any excess oil. Stay warm and avoid cold wind, cold showers, or air conditioning directly on the treated area for at least 24 hours.


Safety Rules to Follow

  • Avoid bony areas — do not cup directly over the spine, shoulder blades, or joints
  • Avoid broken or irritated skin — never apply cups to wounds, sunburn, rashes, or eczema
  • Stay within time limits — beginners should keep sessions to 3–5 minutes maximum
  • Avoid the face and front of the neck — these areas have sensitive structures and are not appropriate for home cupping
  • Do not cup the same area two days in a row — allow marks to fade before repeating

Section 4: Understanding Cupping Marks

One of the most common questions from first-time users is: “Why did cupping leave a mark on my skin, and is that normal?”

The circular discolorations that appear after cupping are not bruises in the traditional sense. A bruise results from blunt impact that damages blood vessels. Cupping marks, by contrast, are caused by the suction drawing blood closer to the skin’s surface — the capillaries become visible.

What the Colors Mean (Traditional Perspective)

In TCM, the color of the mark has traditional interpretive significance, though these are not medical diagnoses:

  • Light pink or no mark — skin in the area is well-circulated; suction was light
  • Red — increased circulation in the area; common on the upper back
  • Dark purple or dark red — area may have had significant stagnation or tension, according to traditional theory

It’s important to note that mark color is influenced by suction strength, duration, and skin type — not just any one factor. These color interpretations come from traditional practice and should not be used to self-diagnose any health condition.

How Long Do Marks Last?

Most cupping marks fade within 3 to 7 days. Lighter marks may disappear within 24 hours. Marks from your first few sessions tend to be darker and take longer to fade.


Section 5: Who Should Avoid Cupping

Cupping is not appropriate for everyone. The following groups should not practice home cupping without prior consultation with a qualified healthcare provider:

  • Pregnant individuals — particularly avoid cupping on the abdomen, lower back, and any area associated with known acupressure contraindications
  • People taking anticoagulant medications (blood thinners such as warfarin) — suction may increase risk of subcutaneous bleeding
  • People with skin conditions — eczema, psoriasis, active rashes, open wounds, or skin infections
  • People with severe anemia or bleeding disorders
  • Children under 12 years old — skin is more sensitive; not recommended without clinical guidance
  • Anyone with active inflammation or fever — cupping is not appropriate during acute illness

If you have any chronic health condition, are under medical care, or are uncertain whether cupping is appropriate for you, please speak with your doctor or a licensed TCM practitioner before starting.


Section 6: Top Picks — Beginner-Friendly Cupping Sets

If you’re ready to start, here are four well-regarded types of cupping sets available on Amazon, curated for beginners:


1. Silicone Cupping Set (Multi-Size, 4–6 Cup Kit)

A standard entry-level silicone set typically includes 4–6 cups in varying sizes. These are flexible, flame-free, and easy to use for back and shoulder areas.

  • Great for: First-time users trying cupping on the back or legs
  • What to look for: Food-grade or medical-grade silicone, smooth rim edges, multiple sizes

Search on Amazon: Silicone Cupping Set Multi-Size


2. Plastic Pump Cupping Set with Suction Gun

These kits include rigid plastic cups and a manual suction gun, allowing you to control exactly how much suction is applied. Good for users who want a more controlled experience.

  • Great for: People sensitive to pressure, or those who want to gradually increase intensity over time
  • What to look for: Clear cup body (so you can see the skin lift), smooth-action pump

Search on Amazon: Cupping Set with Suction Gun


3. Massage Cupping Set (Silicone, for Moving Cupping)

Designed specifically for gliding over oiled skin rather than staying stationary. These cups are typically softer and more pliable, making them ideal for massage-style use on the back and thighs.

  • Great for: Users interested in combining cupping with self-massage
  • What to look for: Extra-soft silicone, ergonomic shape, moderate suction

Search on Amazon: Silicone Massage Cupping Set


4. Complete TCM Cupping Kit (Beginner Bundle)

Some brands offer beginner-focused bundles that include an instruction booklet, multiple cup types, oil, and a storage bag — a convenient all-in-one starter package.

  • Great for: Beginners who want everything in one kit without guessing what accessories they need
  • What to look for: English instructions included, reputable brand with verified reviews

Search on Amazon: Beginner Cupping Kit Complete Set


Conclusion

Cupping therapy is one of the more approachable TCM practices for home use, particularly once you understand the basics. Starting with a simple silicone set, applying it to accessible areas like the upper back, and keeping sessions to 5 minutes or less is the safest way to begin.

The most important principle: start slow, stay safe, and listen to your body. Cupping marks are normal, discomfort is not. If anything feels wrong — sharp pain, excessive redness, or prolonged skin sensitivity — stop the session immediately and allow the area to rest.

When in doubt, consult a licensed TCM practitioner or your healthcare provider. Home practice is best used as a complement to — not a replacement for — professional care.


Photo credits: RDNE Stock project via Pexels

This content is for informational purposes only and is not medical advice. Always consult a healthcare professional before starting any wellness practice.